DingTalk Channel Configuration (Recommended)
Create a DingTalk Application
Video Tutorial:
Step-by-Step Guide:
- Open the DingTalk Developer Console.
-
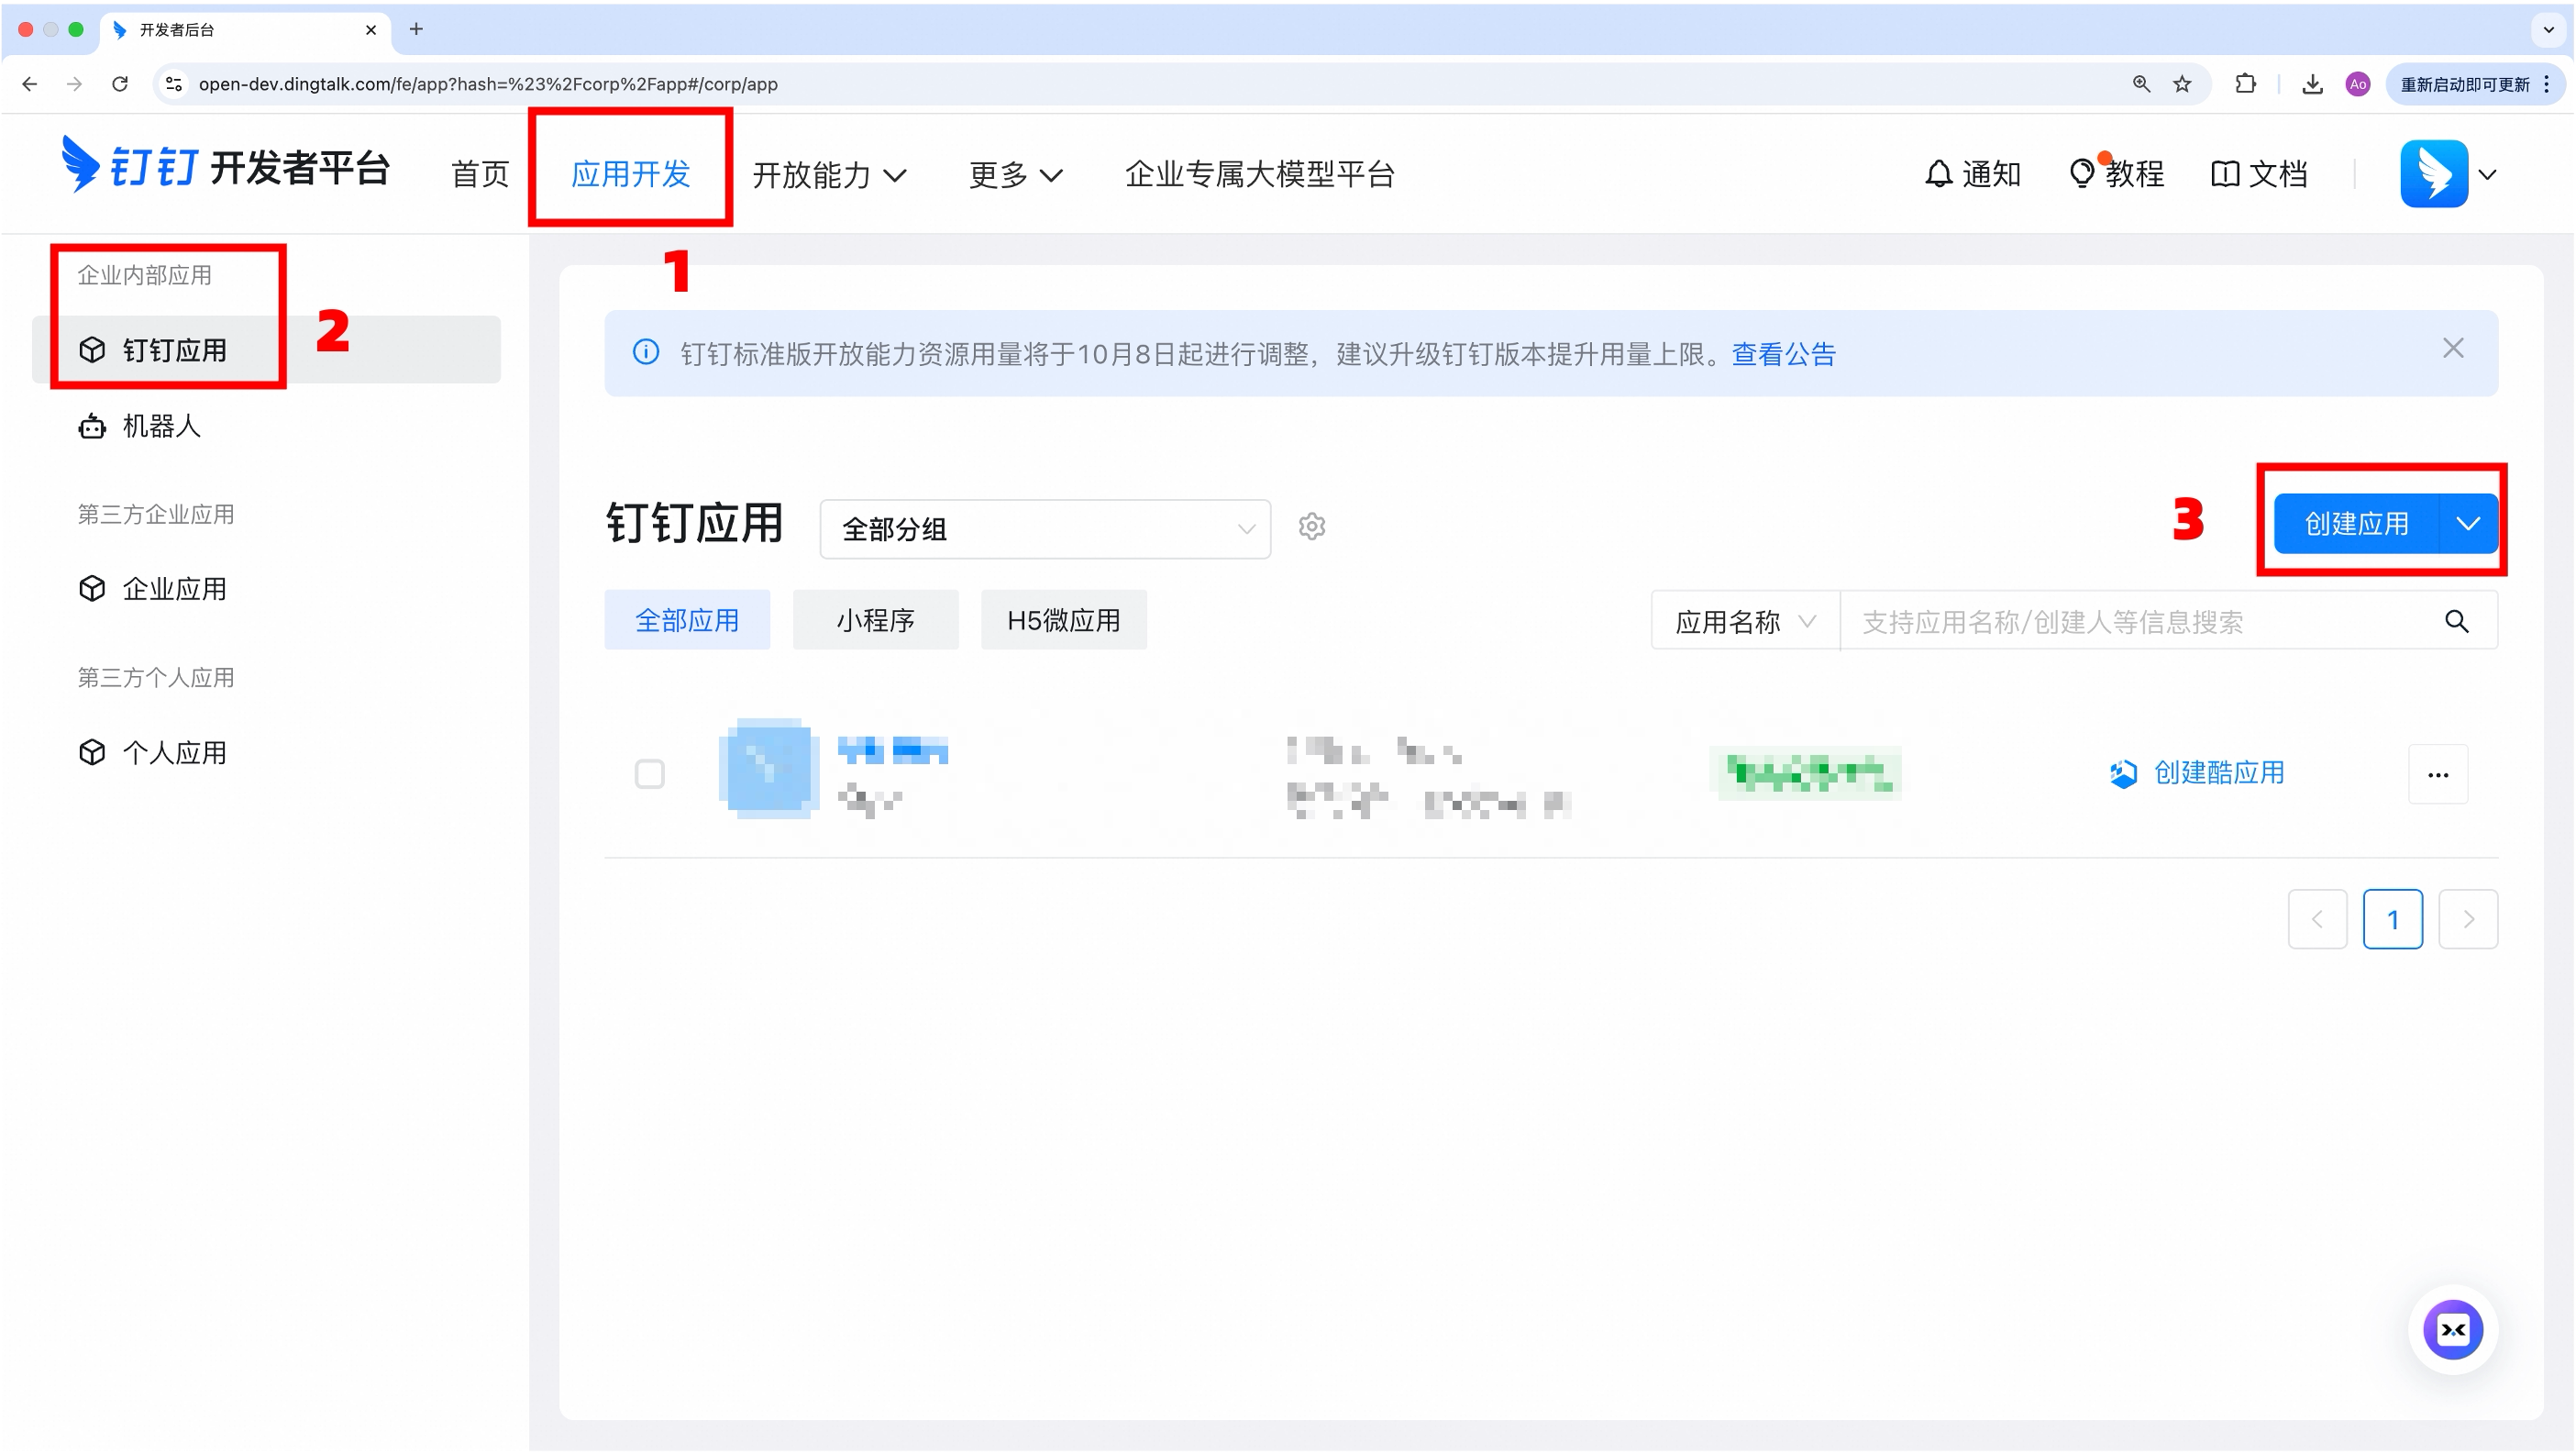
Navigate to “App Development → Enterprise Internal App → DingTalk App → Create App“.

-
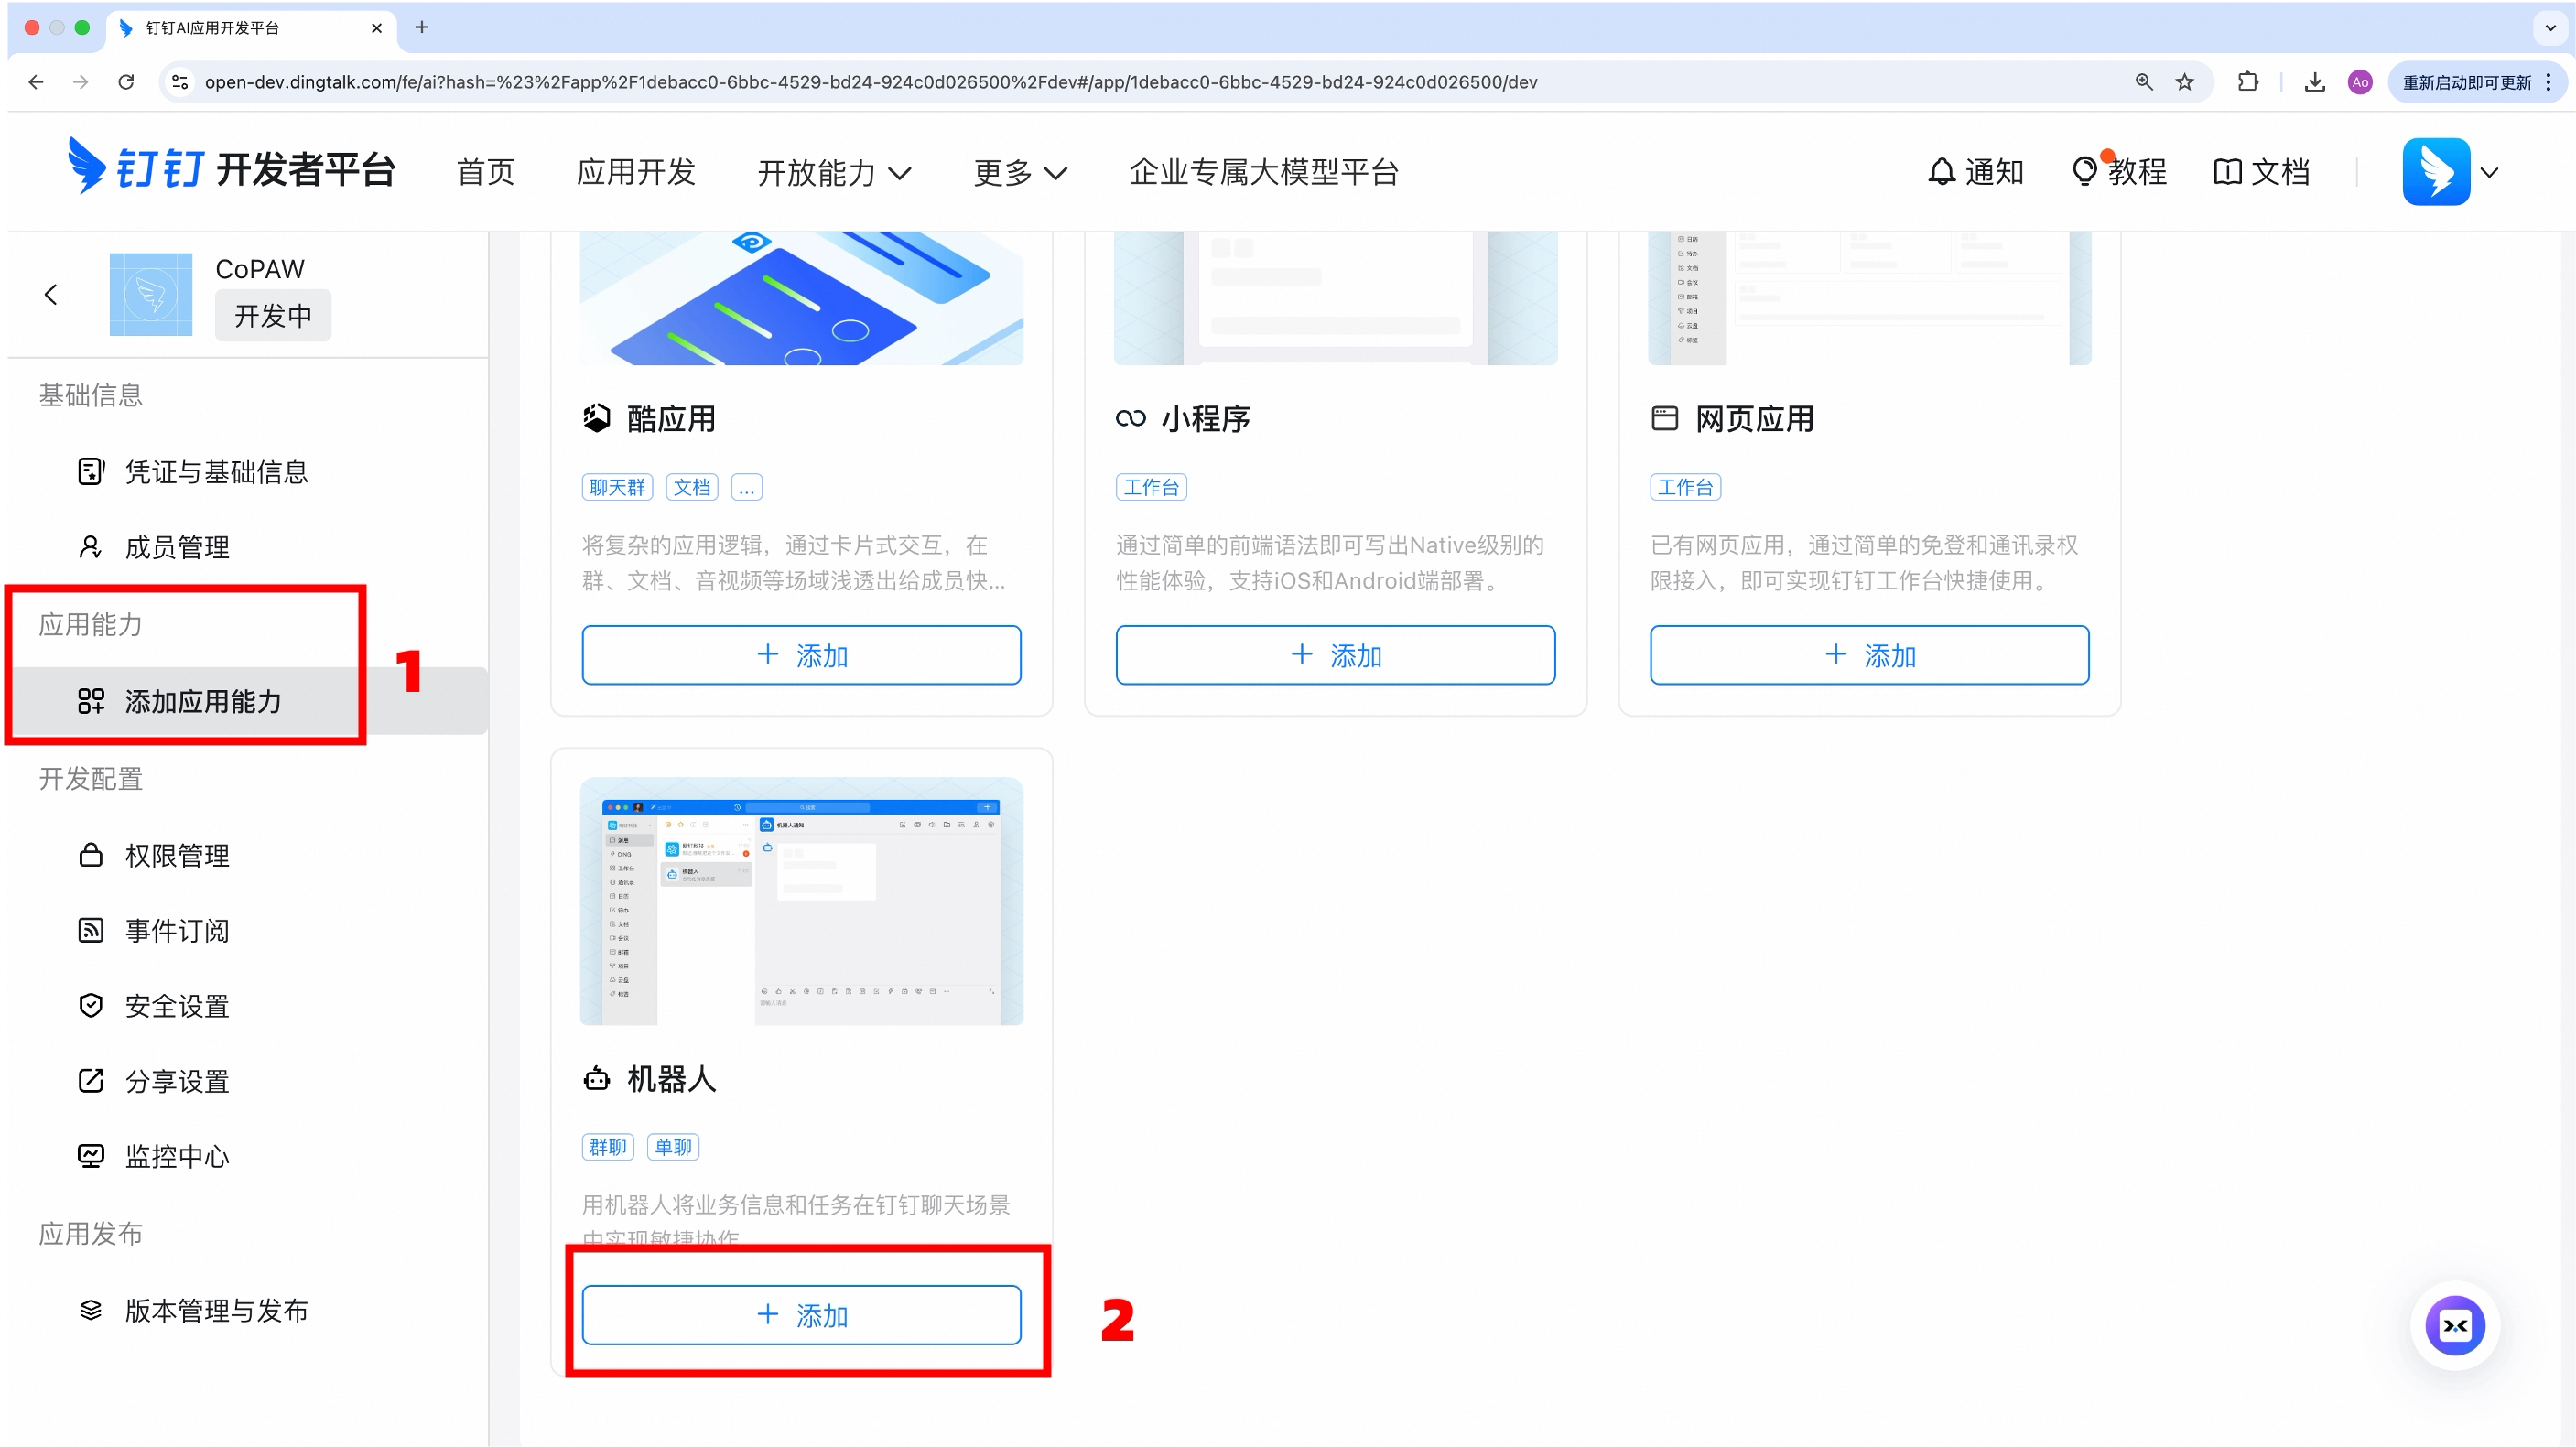
In “App Features → Add App Features”, add the 「Robot」 capability.
-
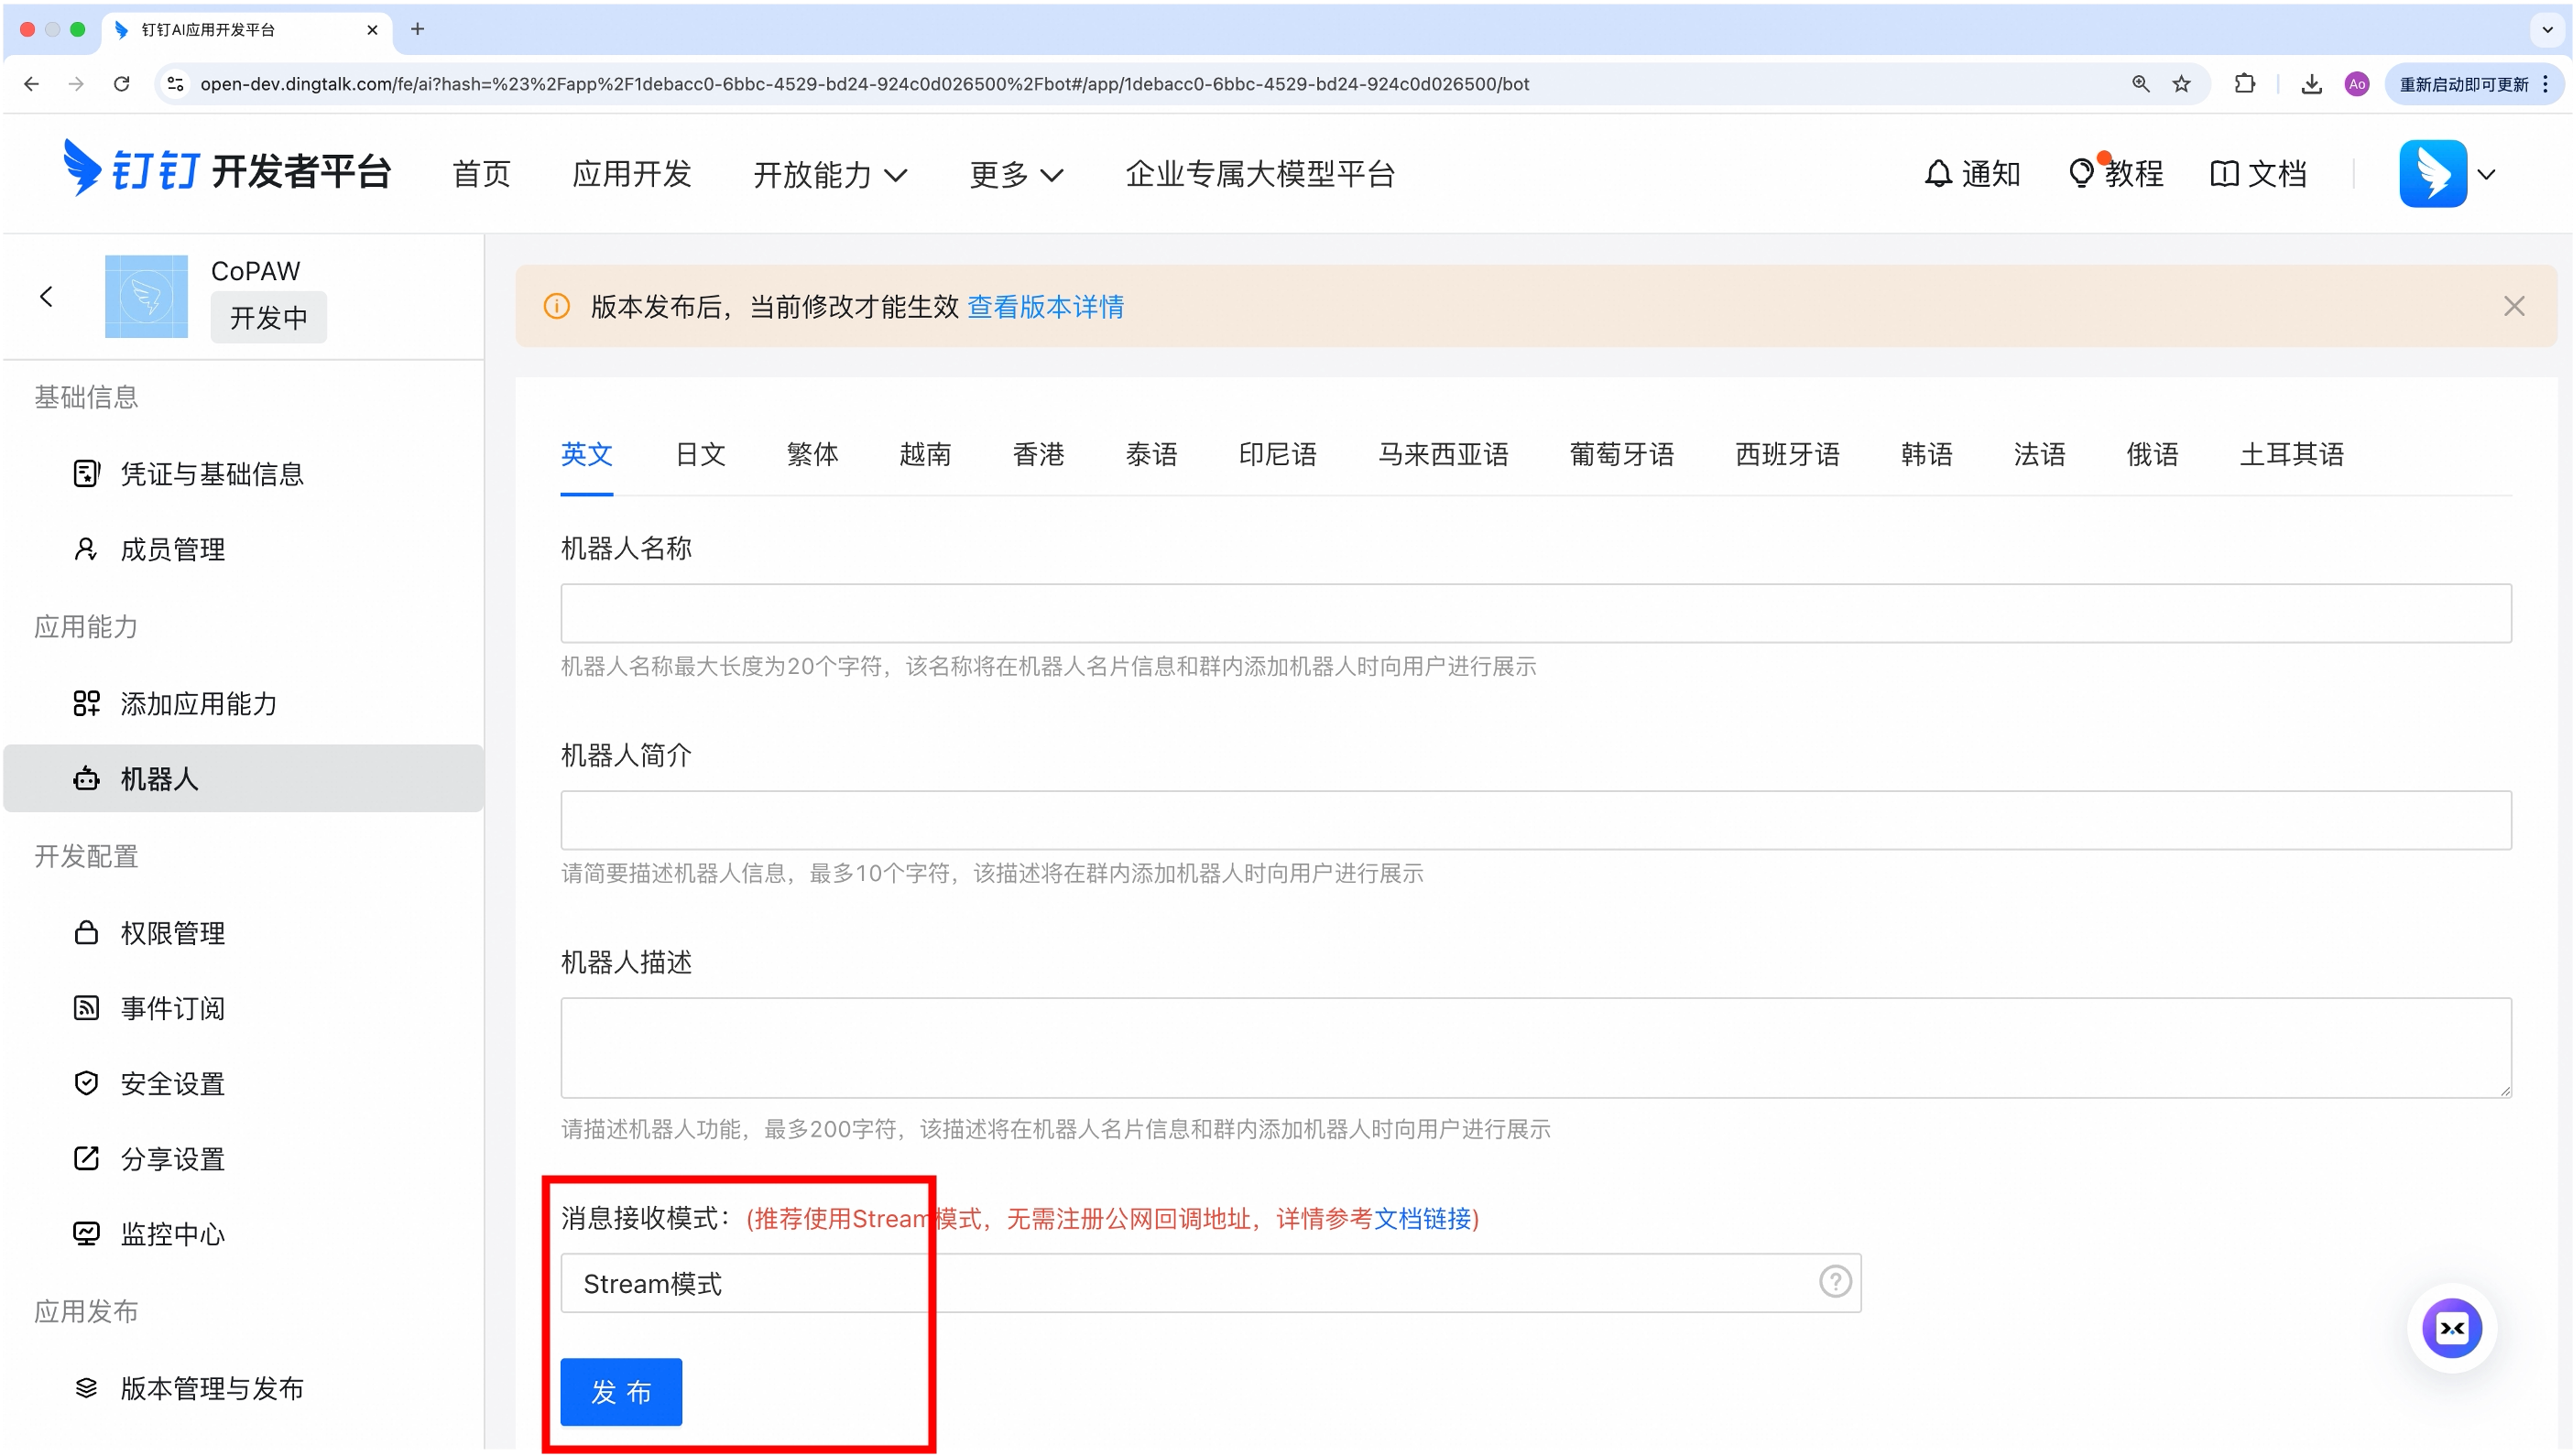
Configure the robot’s basic information, set the message reception mode to Stream Mode, and click Publish.
-
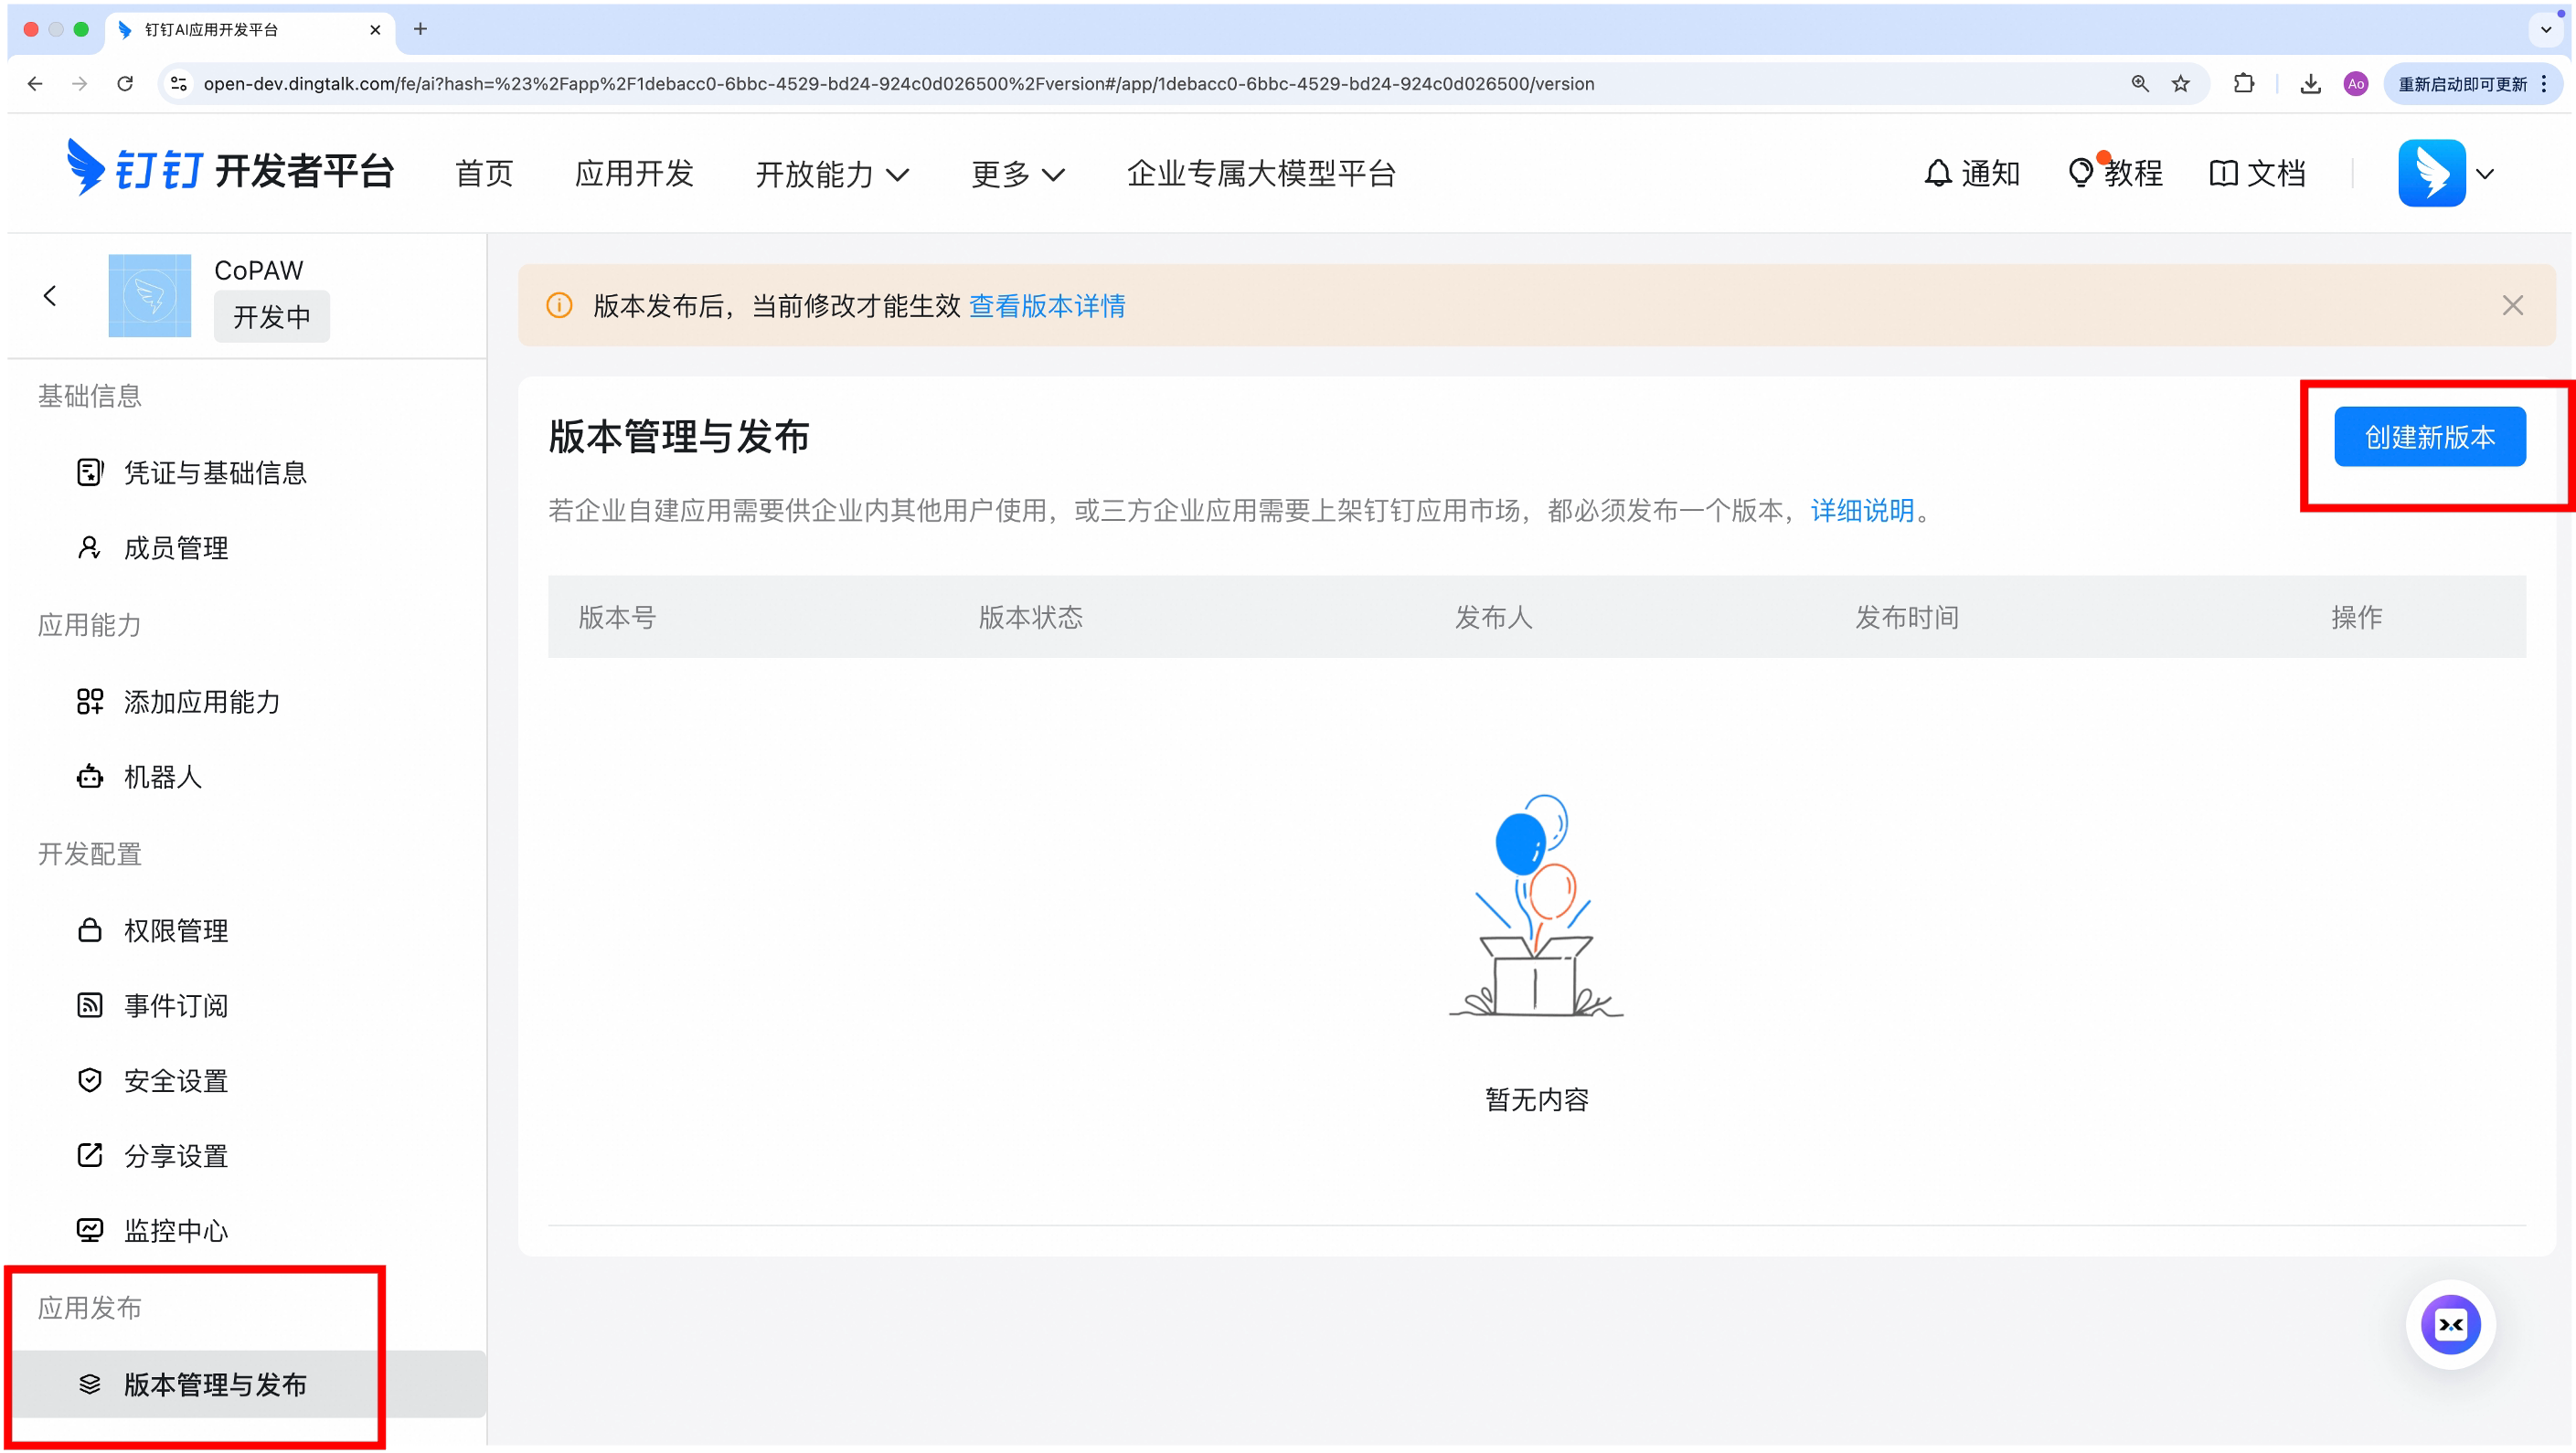
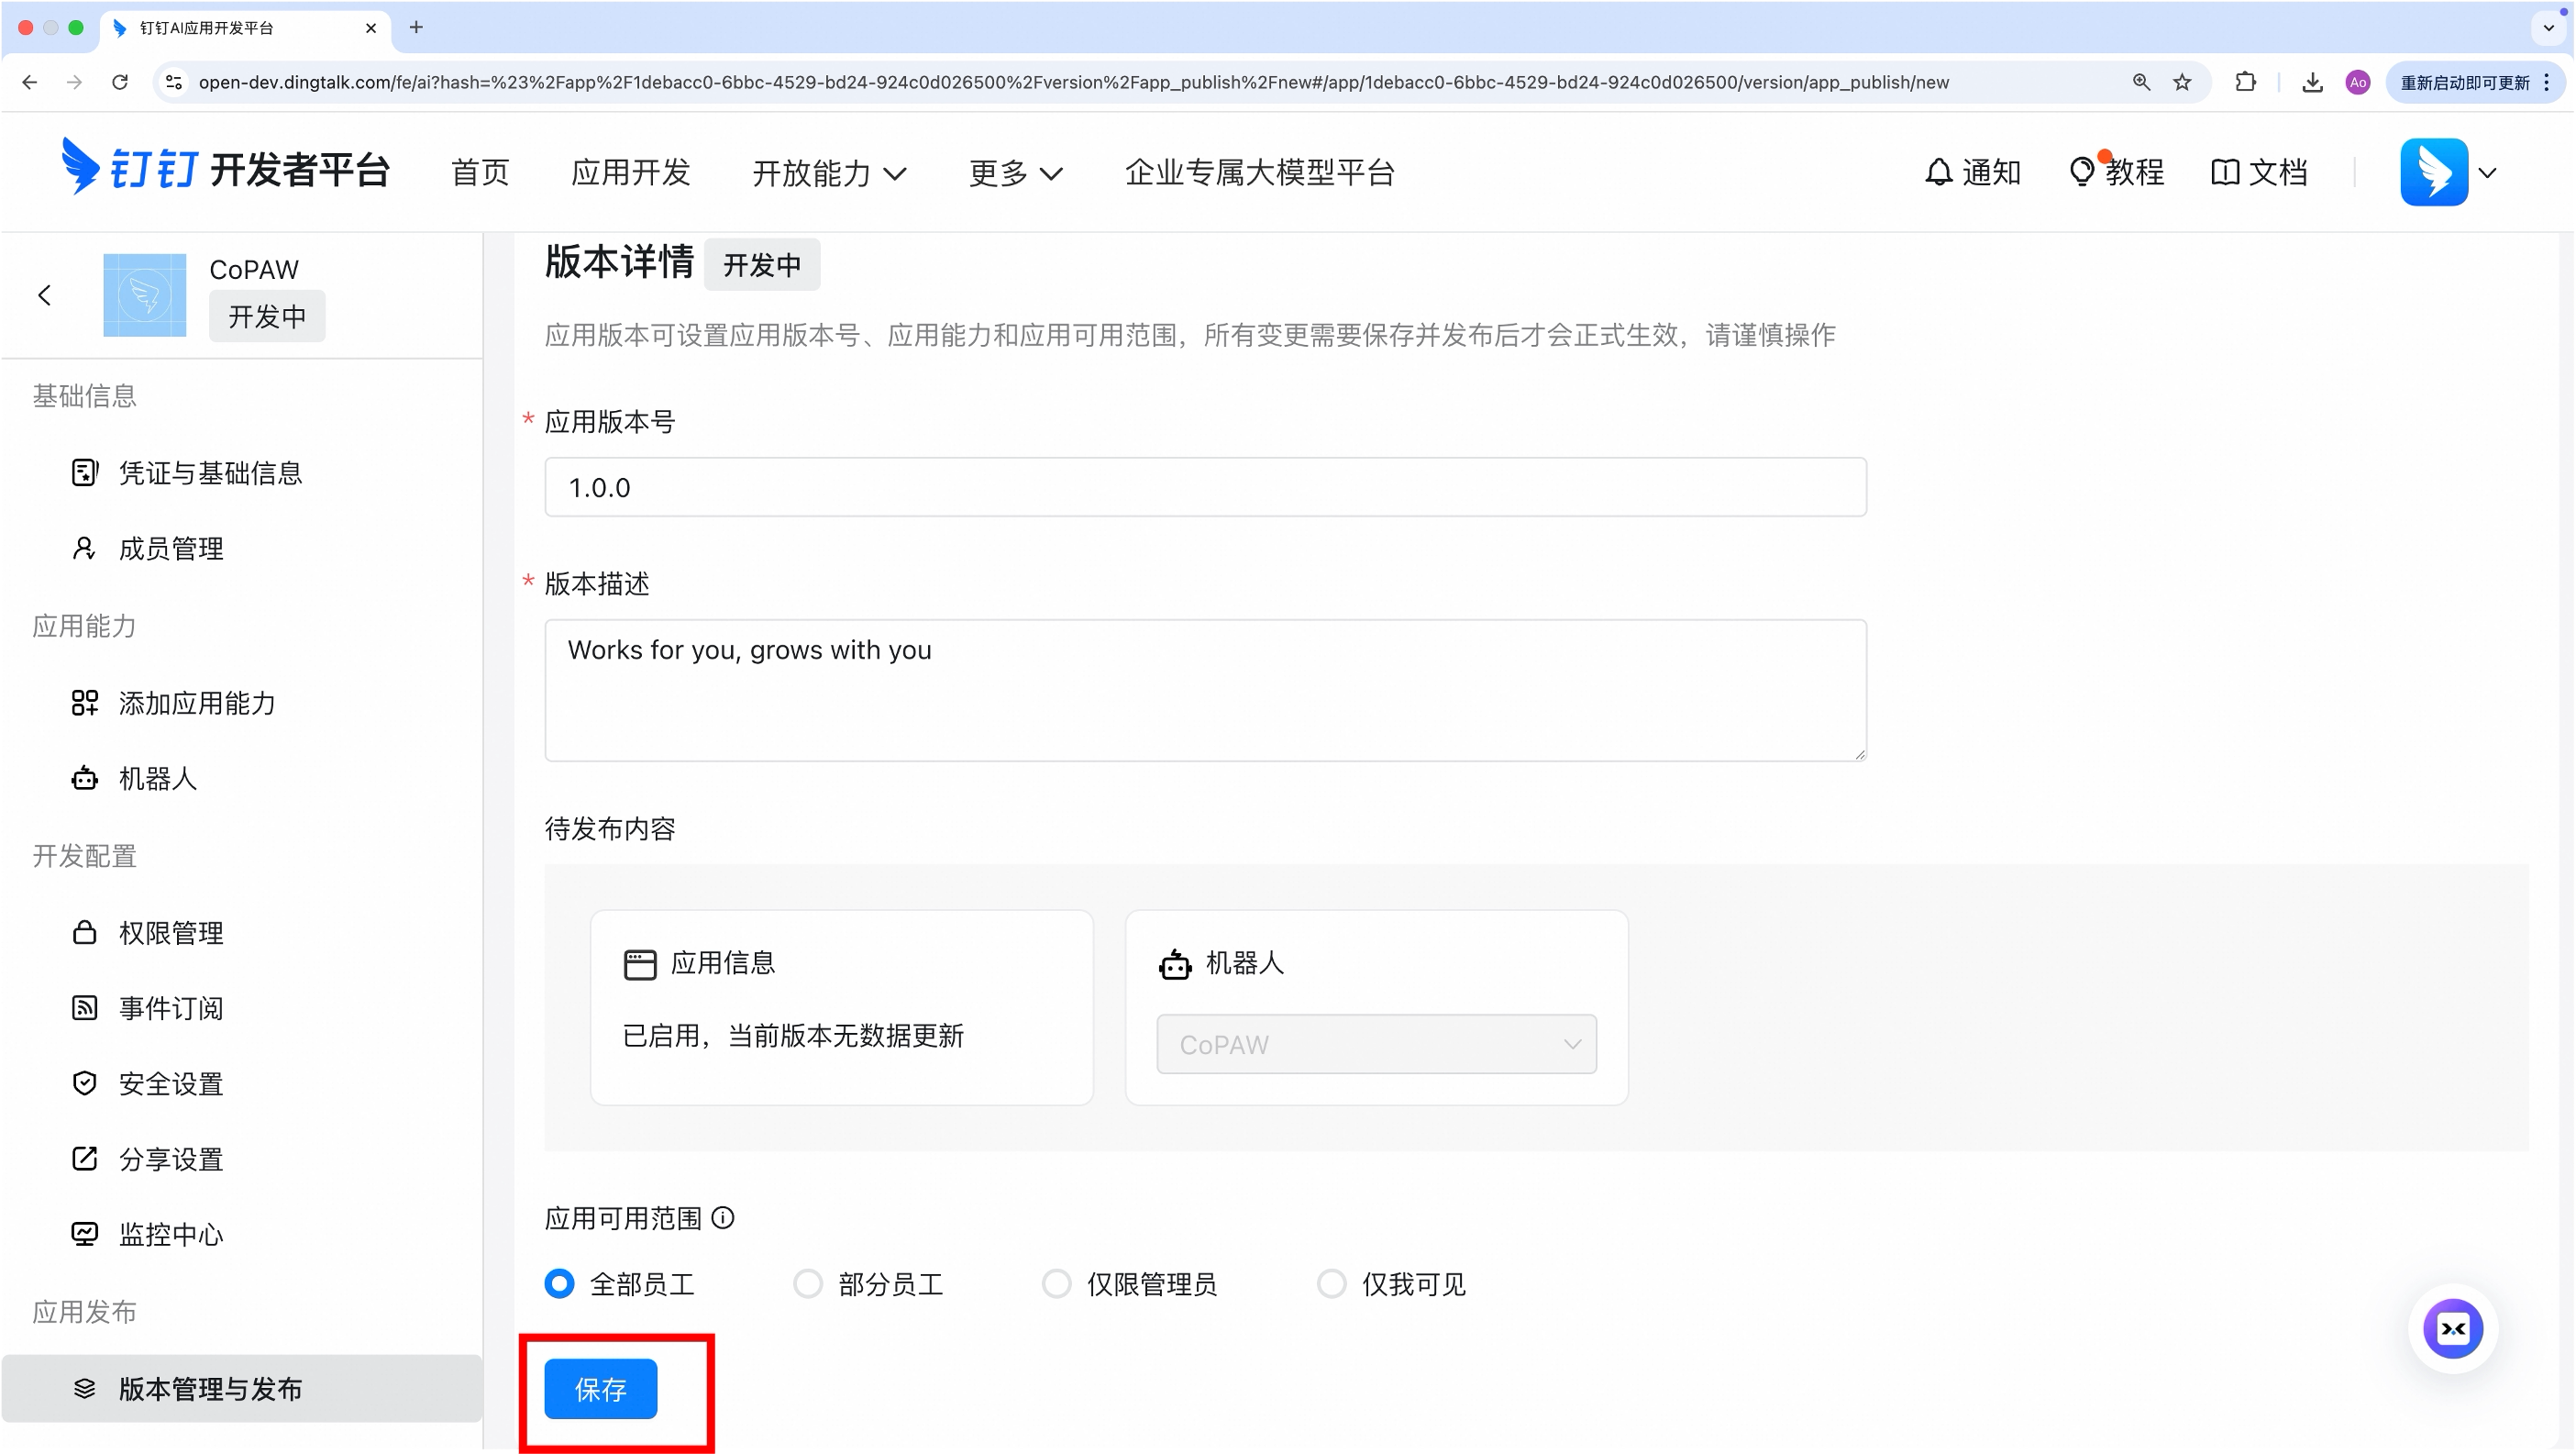
Under “App Release → Version Management & Release”, create a new version, fill in the basic info, and save.
-
In “Basic Information → Credentials & Basic Info”, obtain:
- Client ID (AppKey)
- Client Secret (AppSecret)
-
(Optional) Add server IP to the whitelist — This is required to call DingTalk Open Platform APIs (e.g., downloading images or files sent by users). Go to “Security Settings → Server Exit IP” in the app settings and add the public IP of the machine running CoPaw. You can check your public IP by running
curl ifconfig.mein the terminal. If the whitelist is not configured, image and file downloads will report aForbidden.AccessDenied.IpNotInWhiteListerror.


Binding the App
Method: Configure in the Frontend
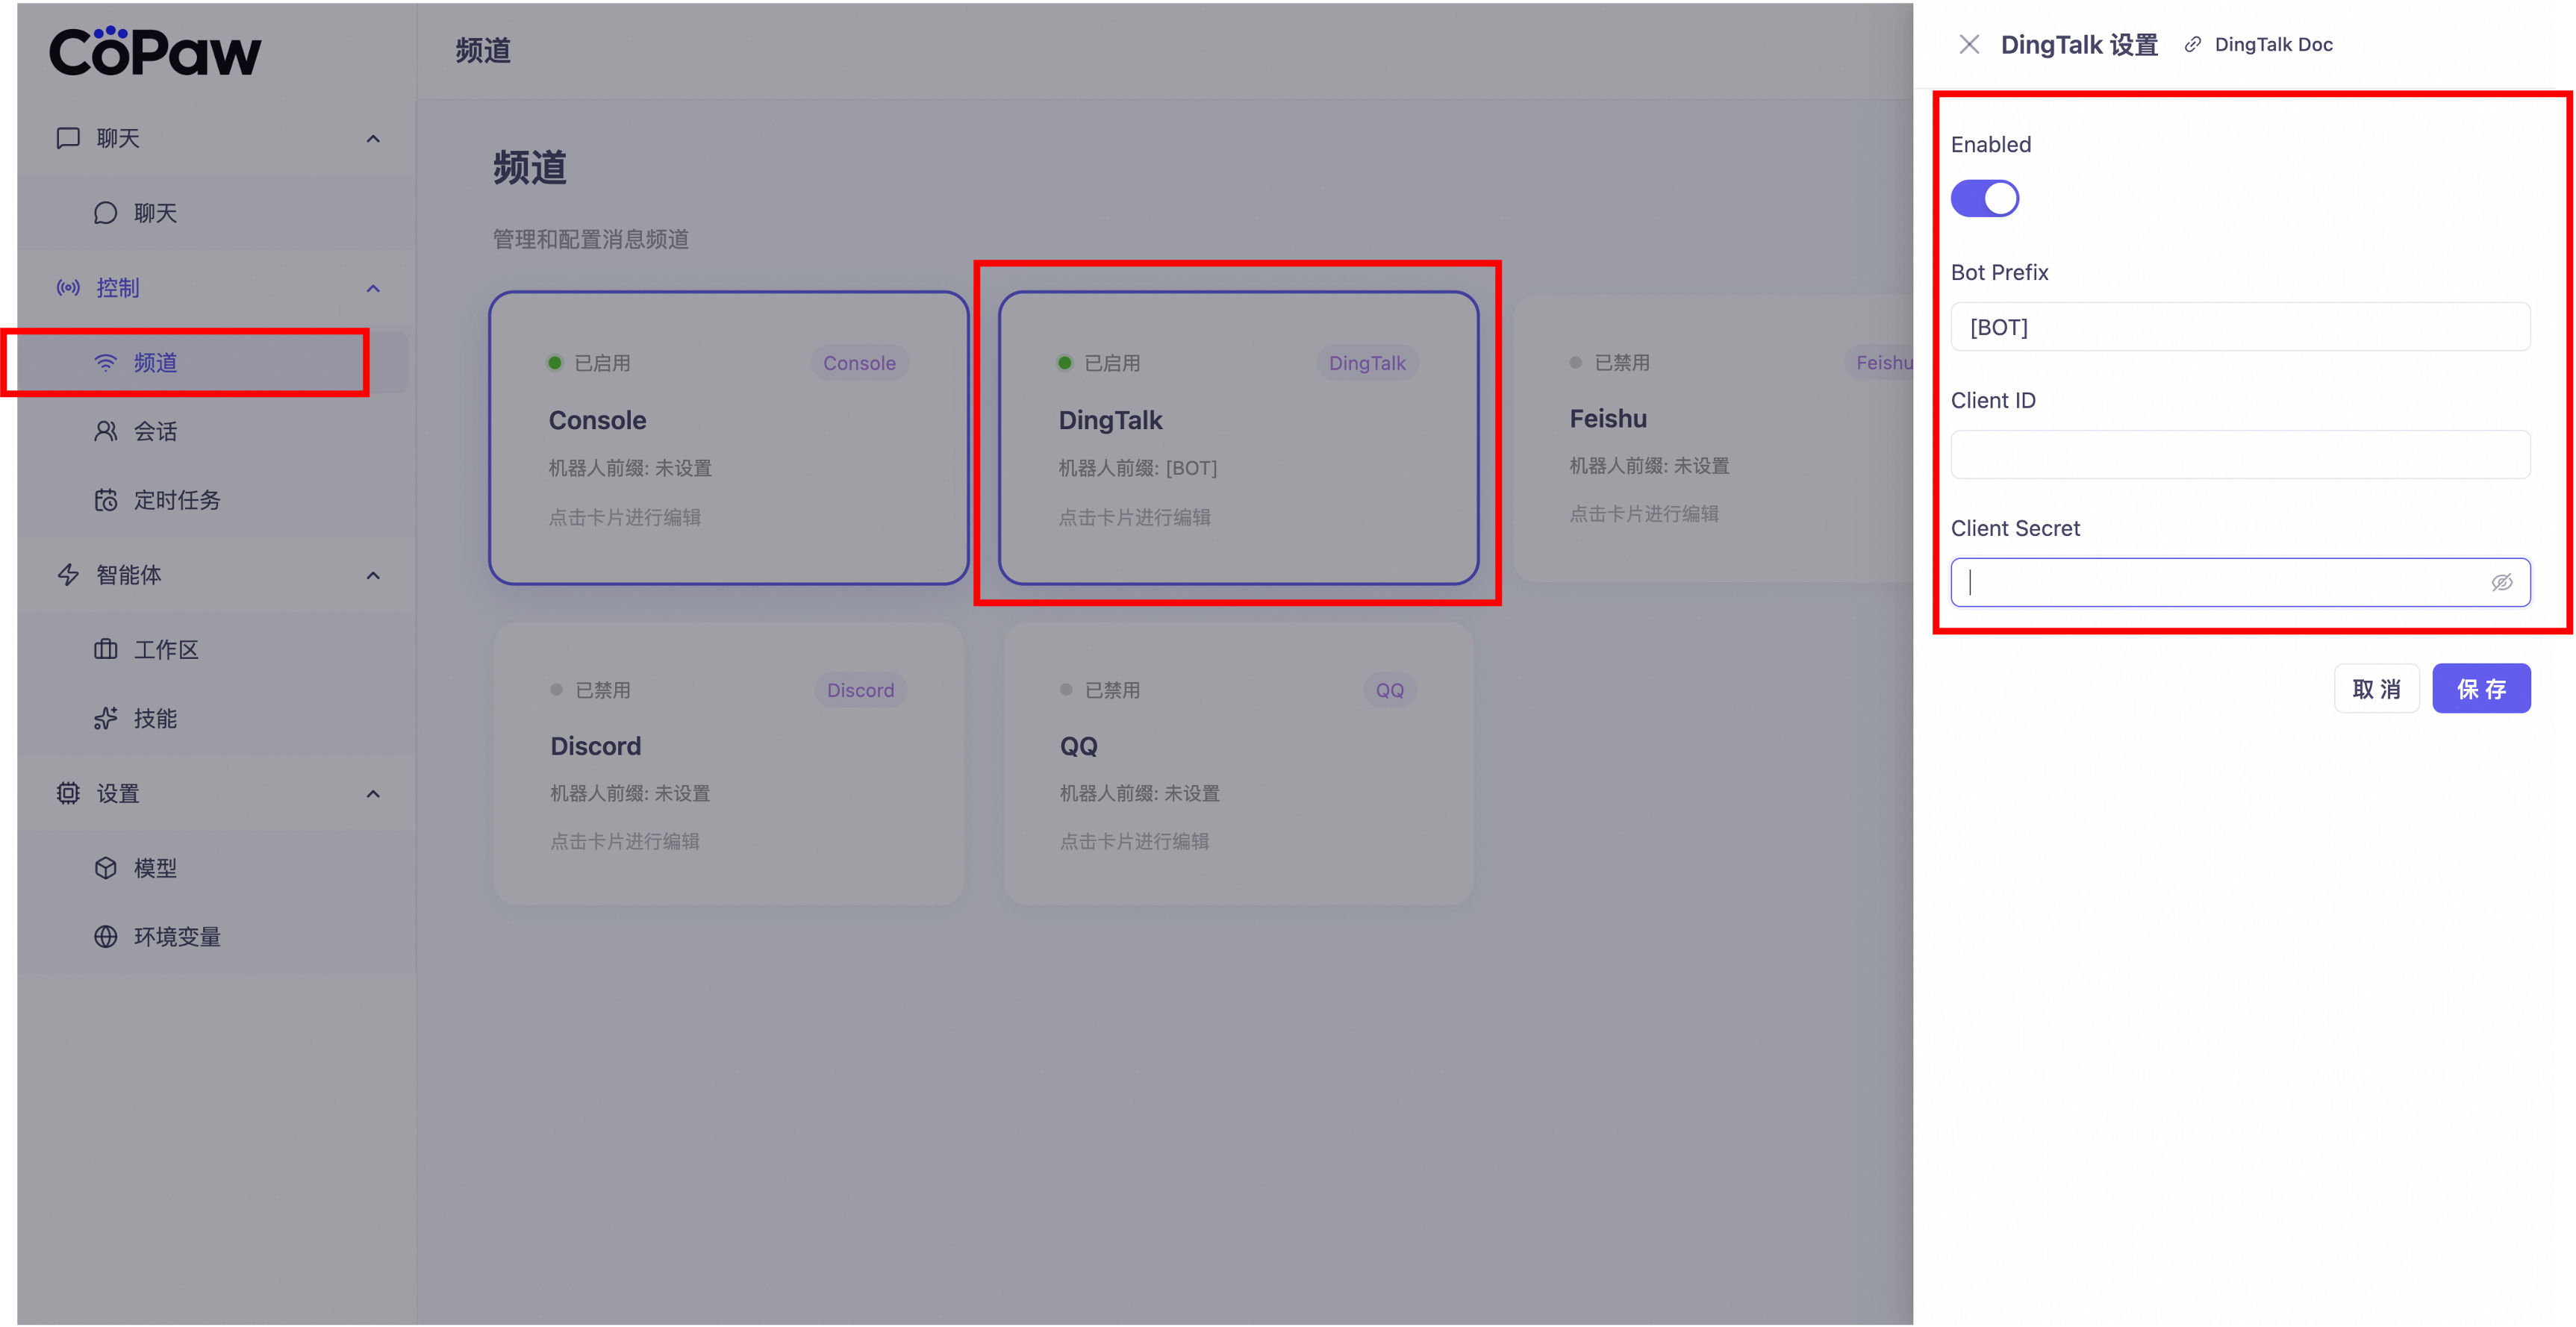
Find DingTalk under “Control → Channel”, click it, and enter the Client ID and Client Secret you just obtained.
Locating Your Created App
Video Tutorial:
Step-by-Step Guide:
-
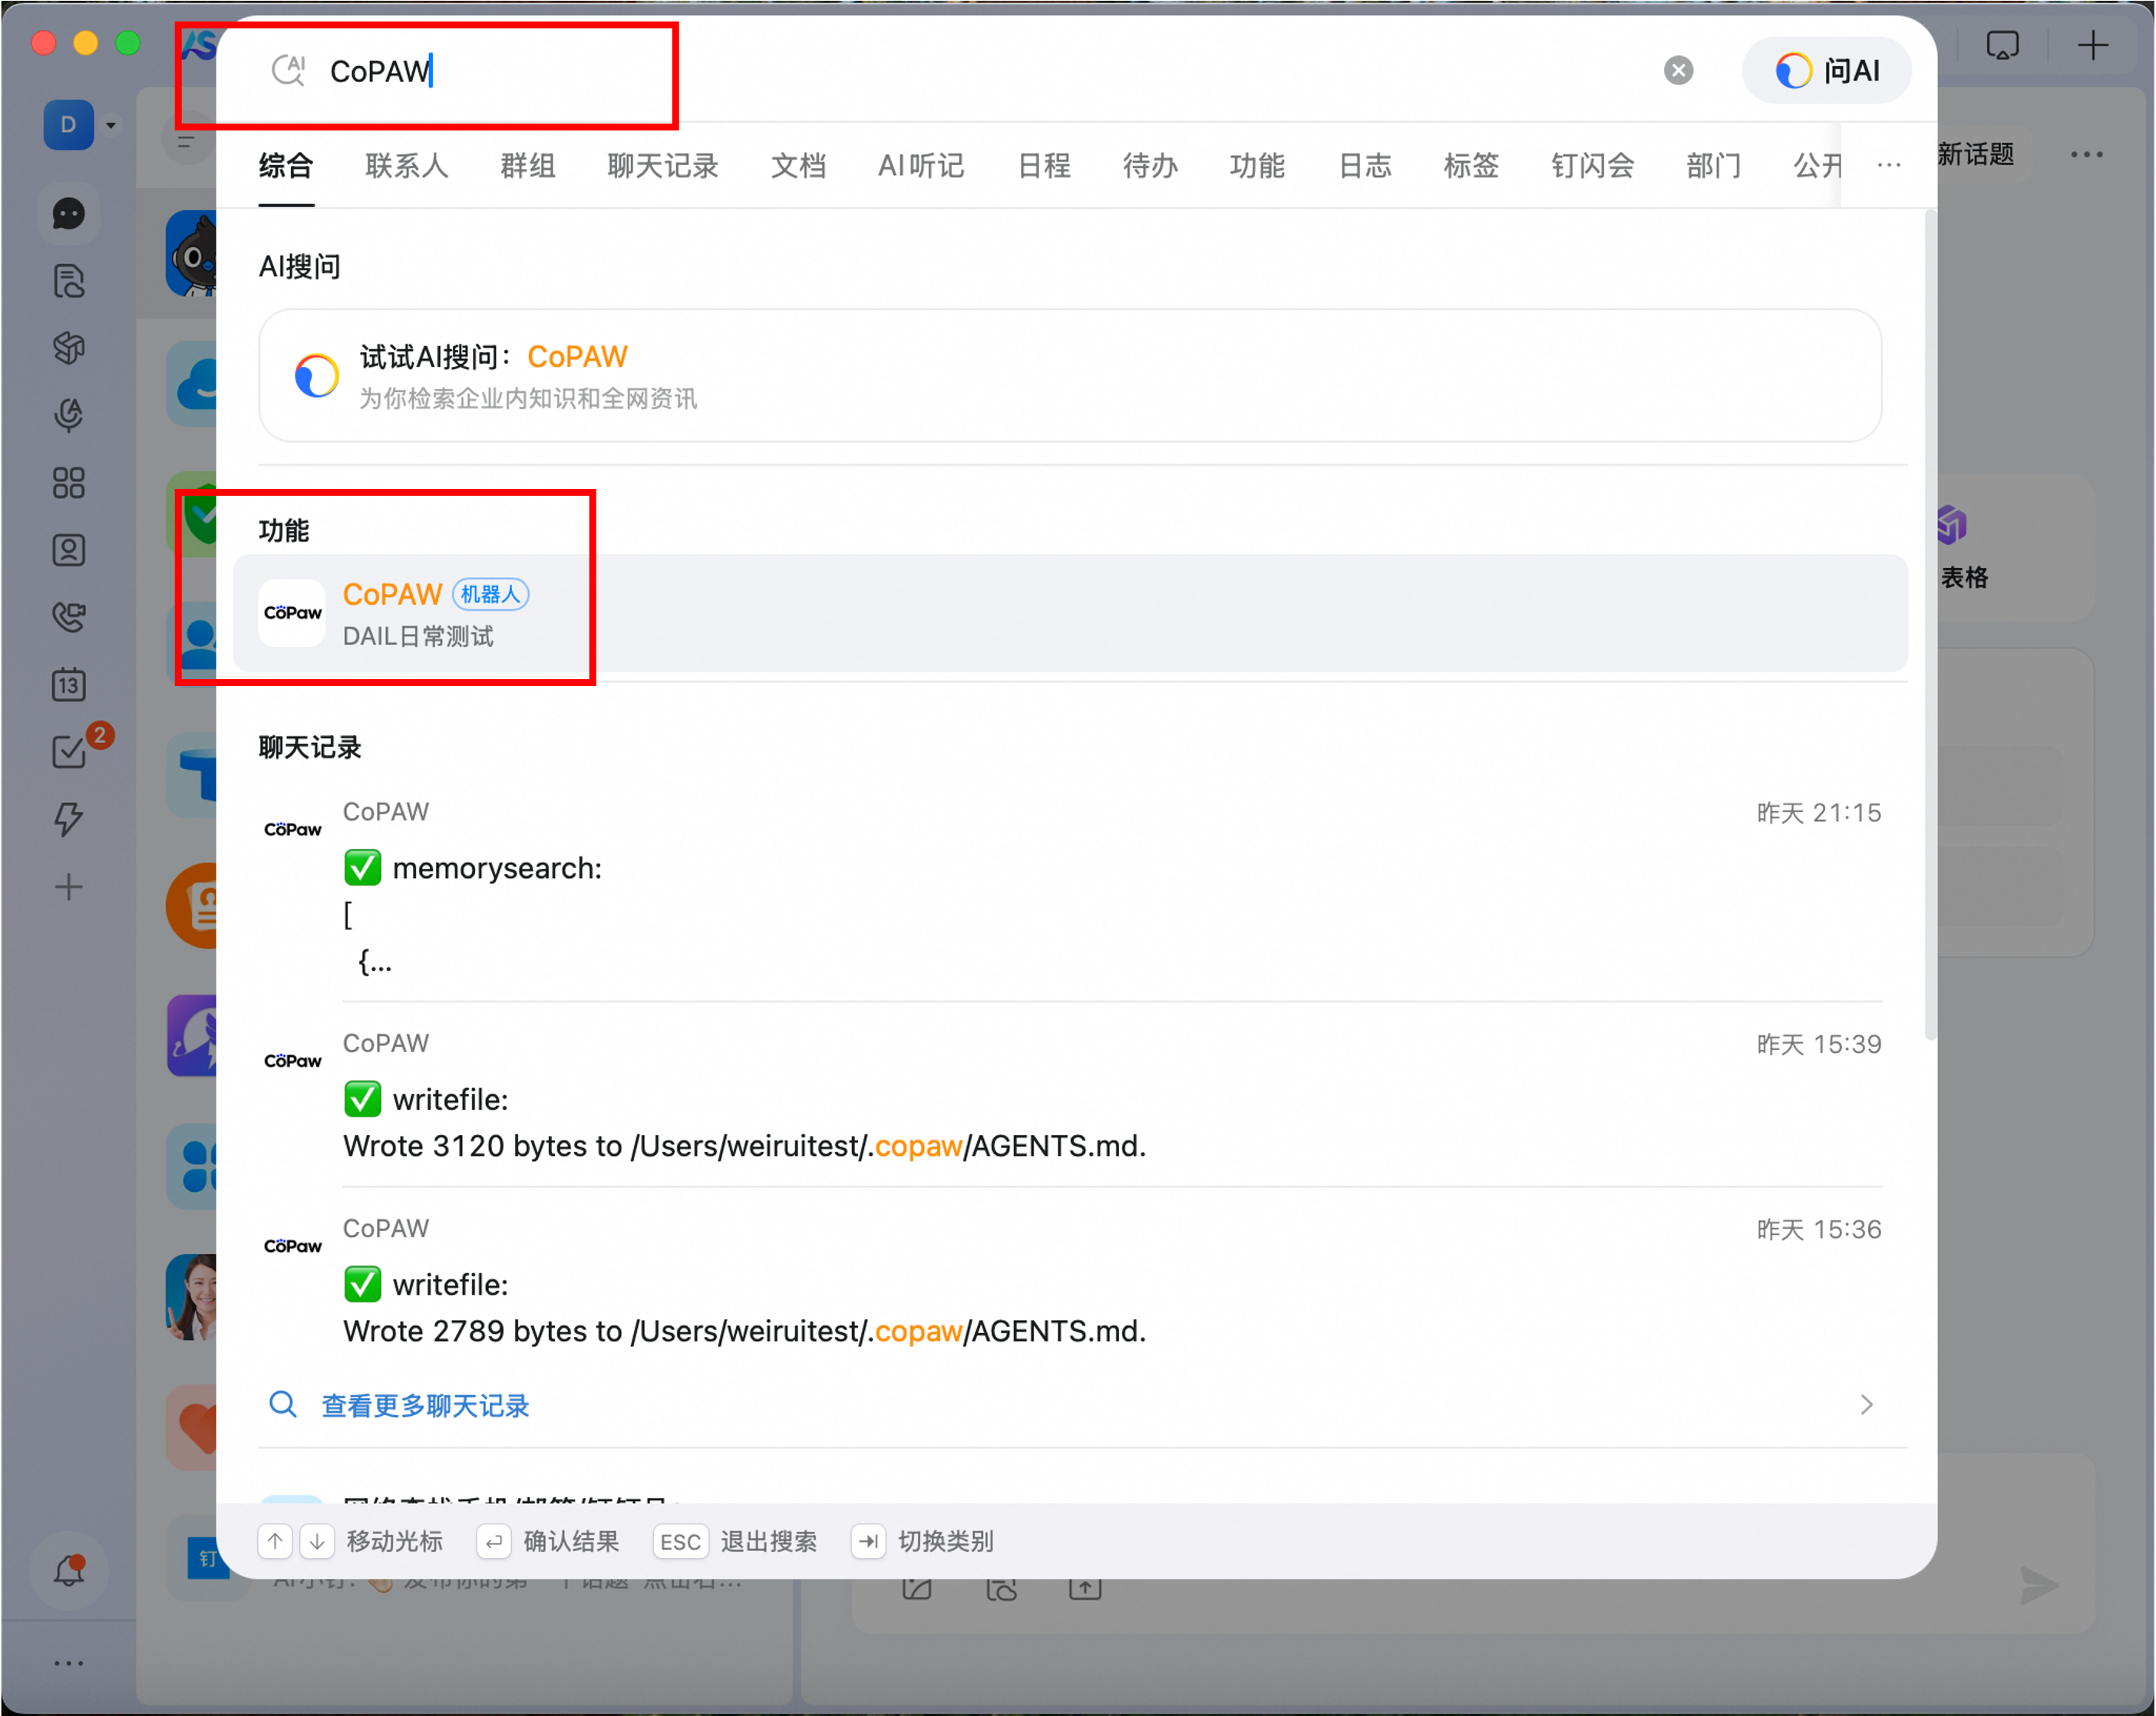
Click the “Search Box” in the DingTalk [Messages] tab.
-
Search for the “Robot Name” you just created, and find the robot under [Functions].
-
Click it to enter the chat interface.


Note: You can add the robot to a group chat via Group Settings → Robot → Add Robot. Please note that creating a group chat directly from the private chat interface with the robot will not trigger the robot’s responses.